for Microsoft 365
Question
How to add ADFS Claim Rule settings to allow access from HENNGE Secure Browser?
Answer
In order to allow access from HENNGE Secure Browser, you can add Claim Rule to permit access based on the Client User Agent. Please follow the instruction below.
I) Add Claim Rule on AD FS (For Windows Server 2016)
II) Add Claim Rule on AD FS (For Windows Server 2012 R2)
I) Add Claim Rule on AD FS (For Windows Server 2016)
1) Go to Server Manager -> AD FS Management

2) In the AD FS Management console, select Access Control Policies -> Select the Access Control Policy that is currently used to control access for your users, and double-click to edit the Access Control Policy.
In this article, we will add a new Access Control Policy as an example setting.

3) Click "Add" to add a new rule.

4) In the "Rule Editor" window:
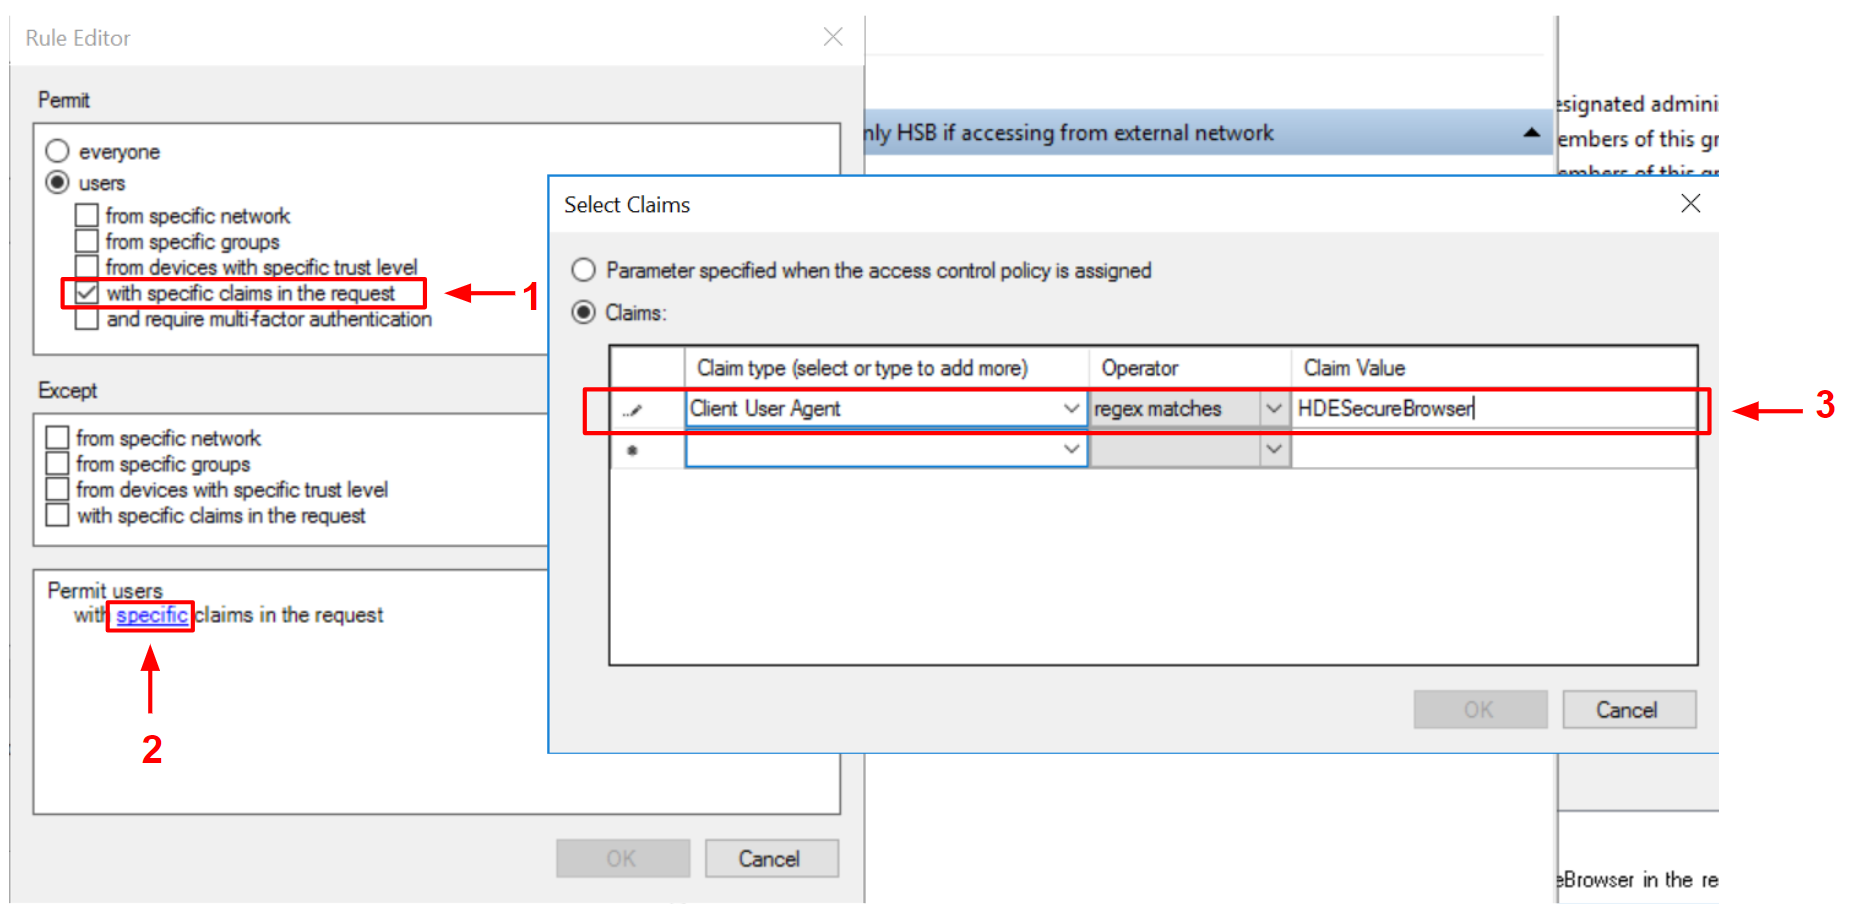
1) Select "users" -> 'with specific claims in the request'
2) Click on "specific", and the "Select Claims" window will show up.
3) Select "Claims:" -> select "Client User Agent" for Claim type -> Select "regex matches" for Operator -> fill in "HENNGESecureBrowser" for Claim Value as shown in the image below.
4) Press enter and click "OK"
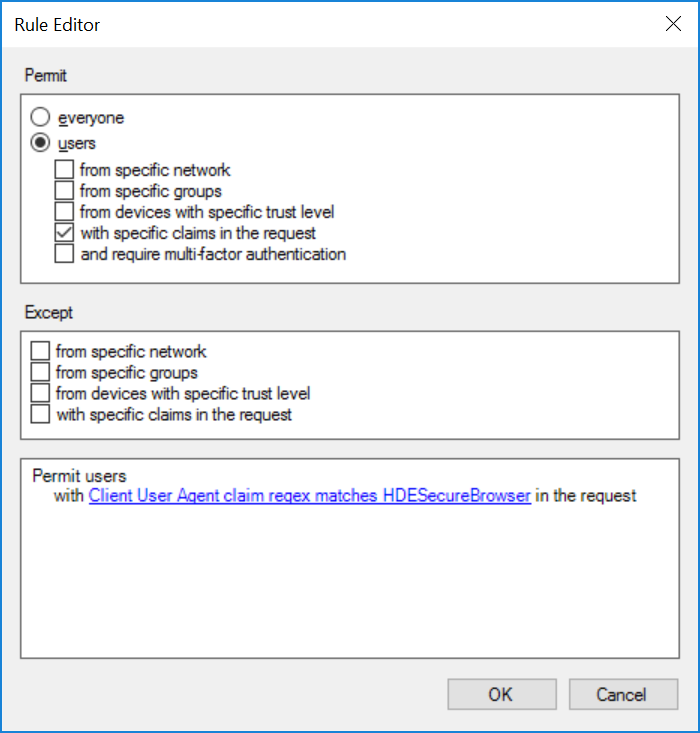
The rule setting shown below will allow access from HENNGE Secure Browser.
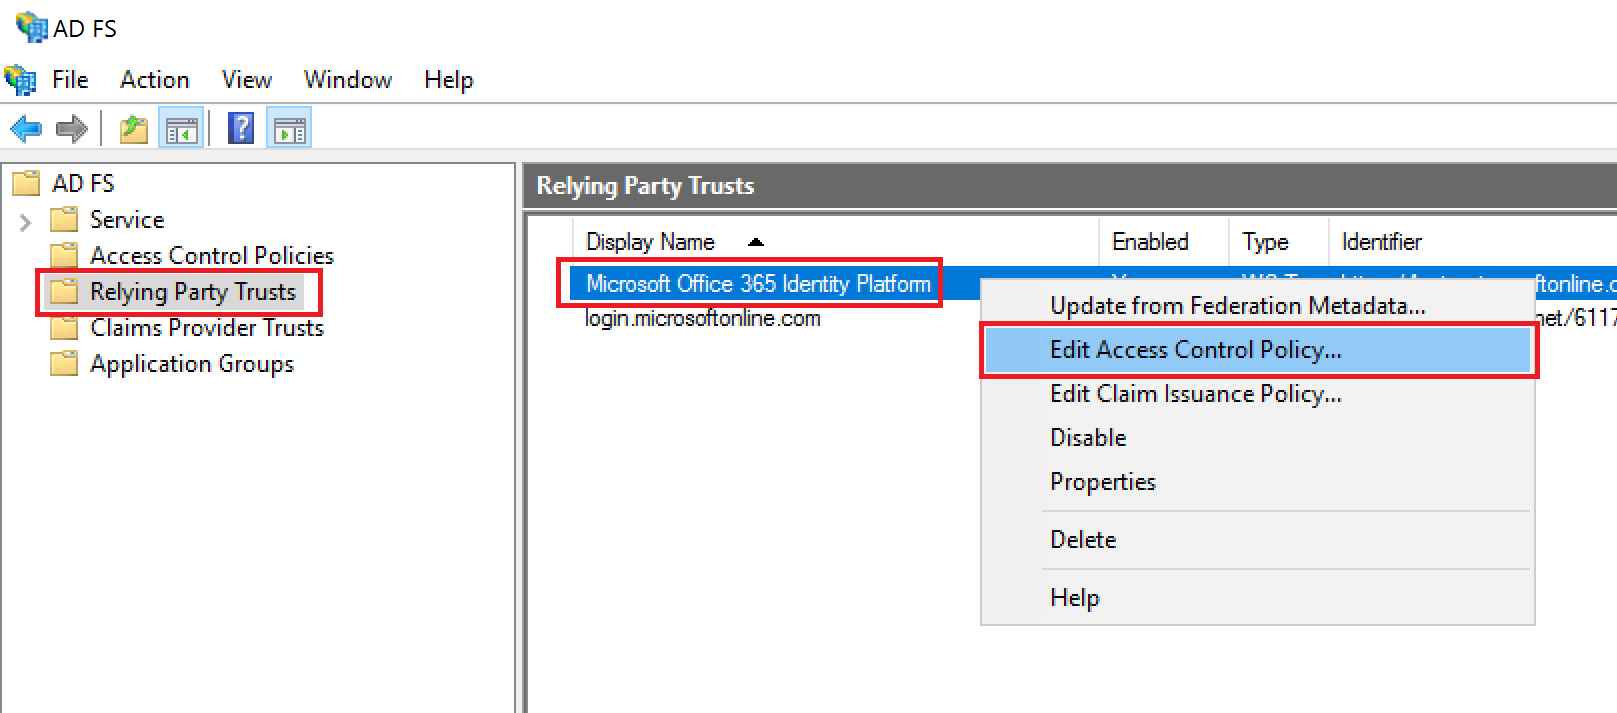
5) Go to Relying Party Trust -> right-click on "Microsoft Microsoft 365 Identity Platform" -> select 'Edit Access Control Policy...' -> select the Access Control Policy that you have just created.
Now, your AD users should be able to access Microsoft 365 from HENNGE Secure Browser.
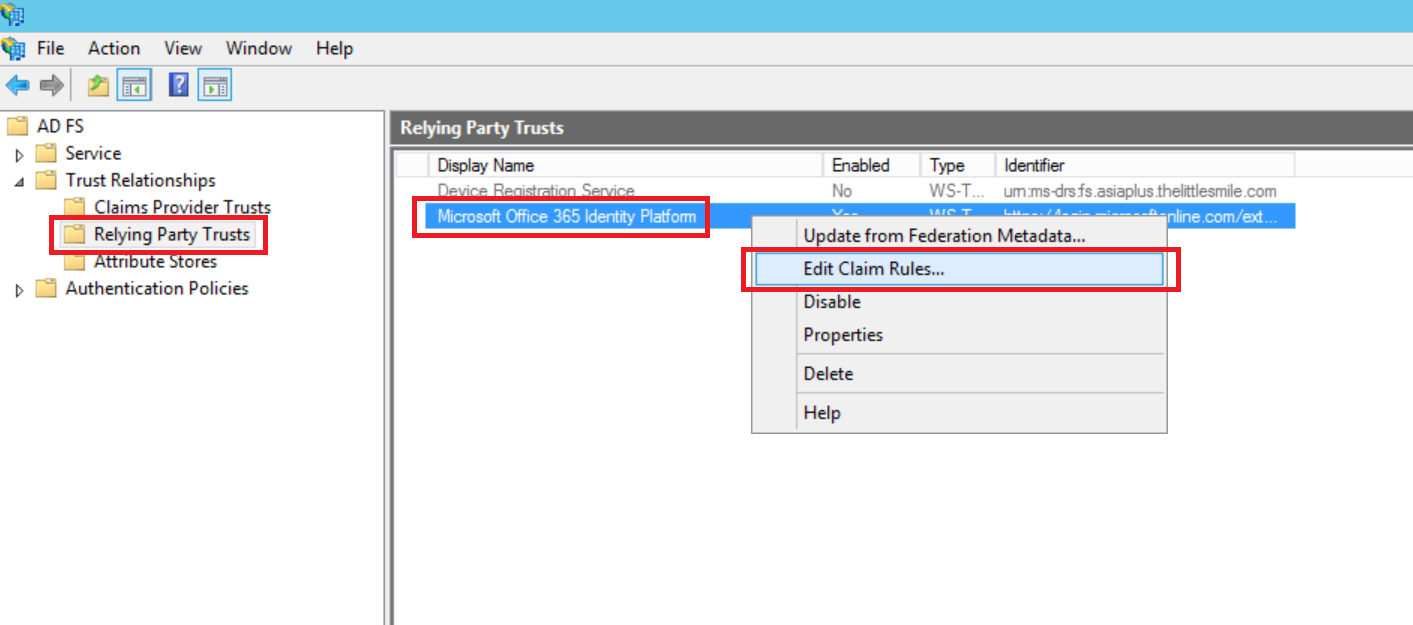
II) Add Claim Rule on AD FS (For Windows Server 2012 R2)
1) Go to Server Manager -> AD FS Management
2) In AD FS Management -> expand Trust Relationships -> select Relying party Trusts -> right-click on "Microsoft Microsoft 365 Identity Platform" -> select "Edit Claim Rules..."
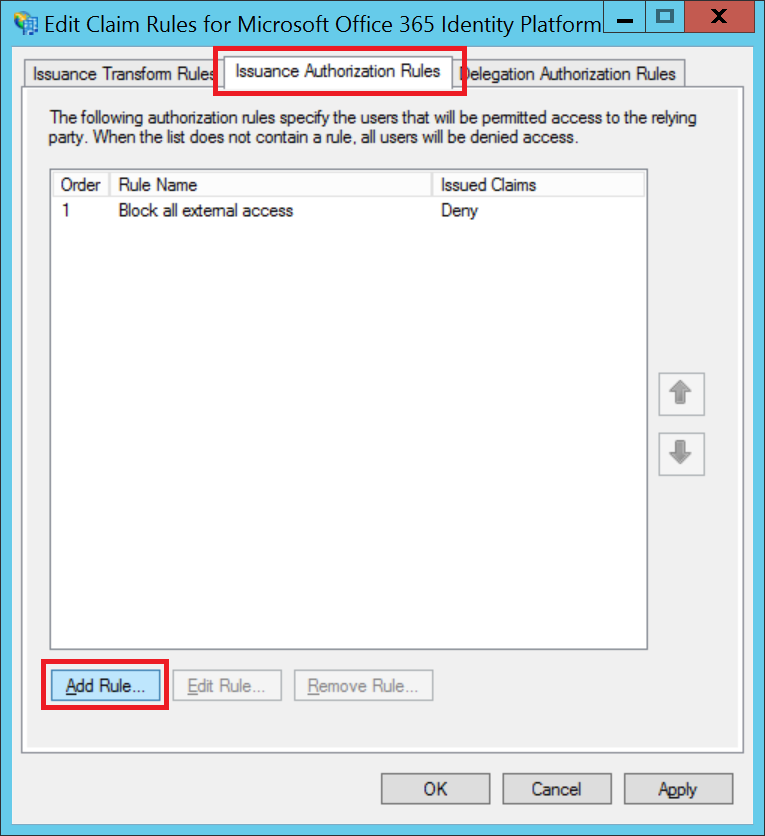
3) Go to Issuance Authorization Rules tab -> Click "Add Rule..."
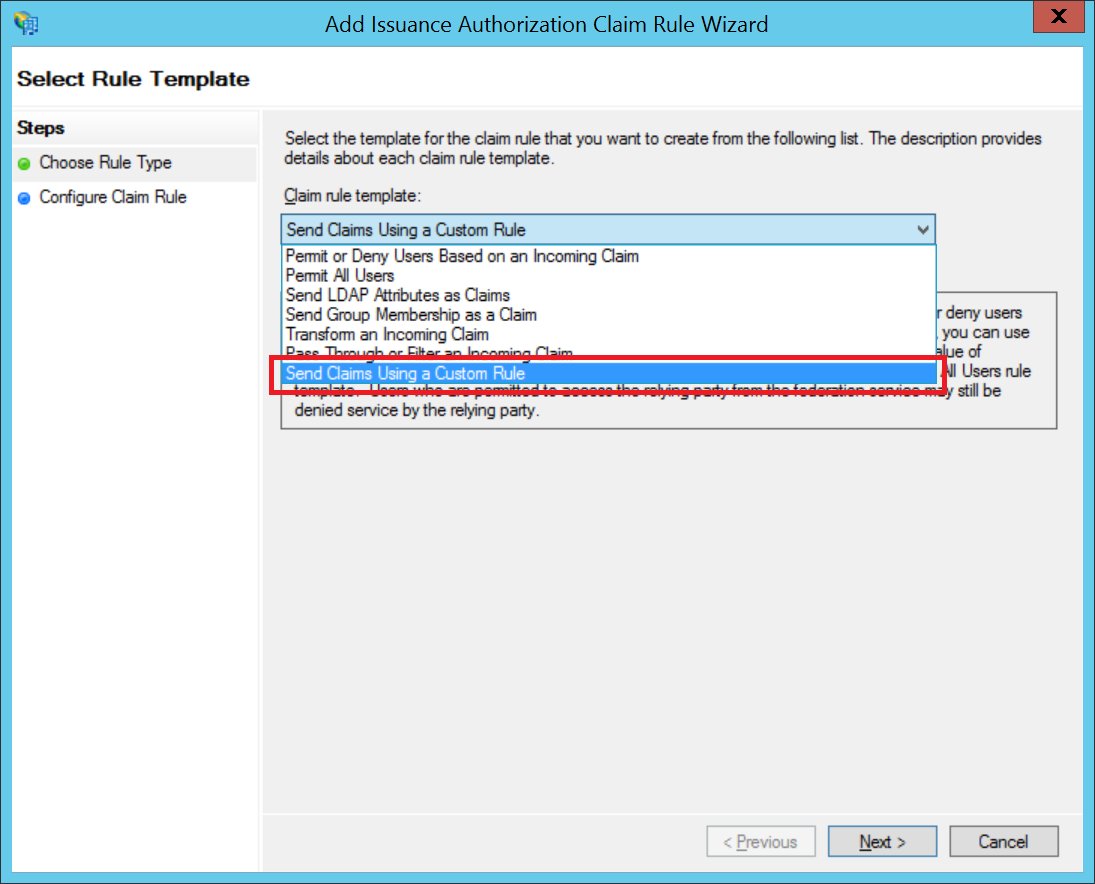
4) In the Claim rule template selection, select
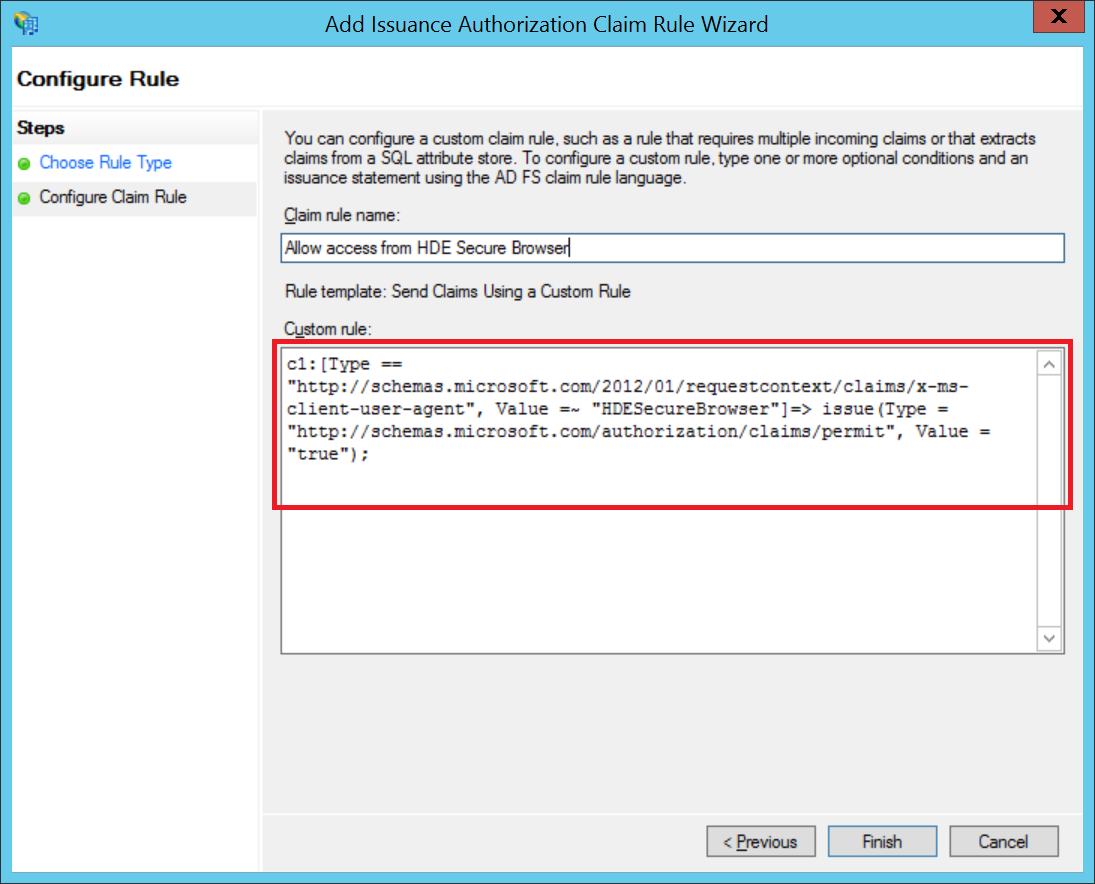
5) Fill in the Claim rule name. In the Custom rule field, fill in the Claim Rule as shown below.
|
c1:[Type == "http://schemas.microsoft.com/2012/01/requestcontext/claims/x-ms-client-user-agent", Value =~ "HENNGESecureBrowser"] => issue (Type ="http://schemas.microsoft.com/authorization/claims/permit", Value ="true"); |
This Claim Rule will permit incoming claim with Client User Agent of HENNGESecureBrowser.
6) Click "Finish" to add a new rule. Now, you have completed adding ADFS Claim Rule setting to allow access from HENNGE Secure Browser.
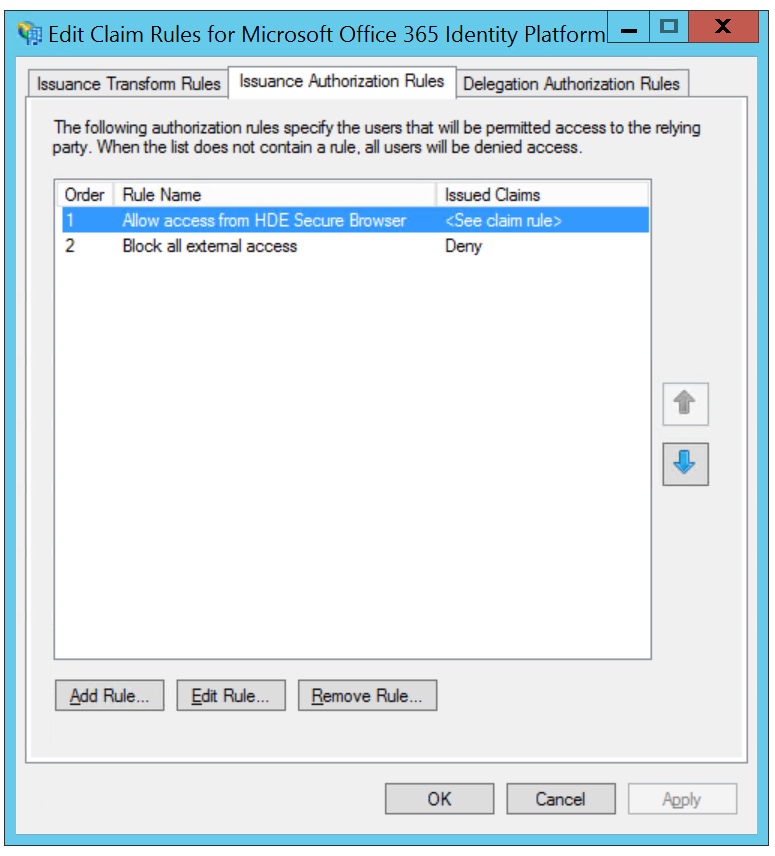
Note: Please ensure that the rule is listed on a higher priority than other access restrictions you have set.